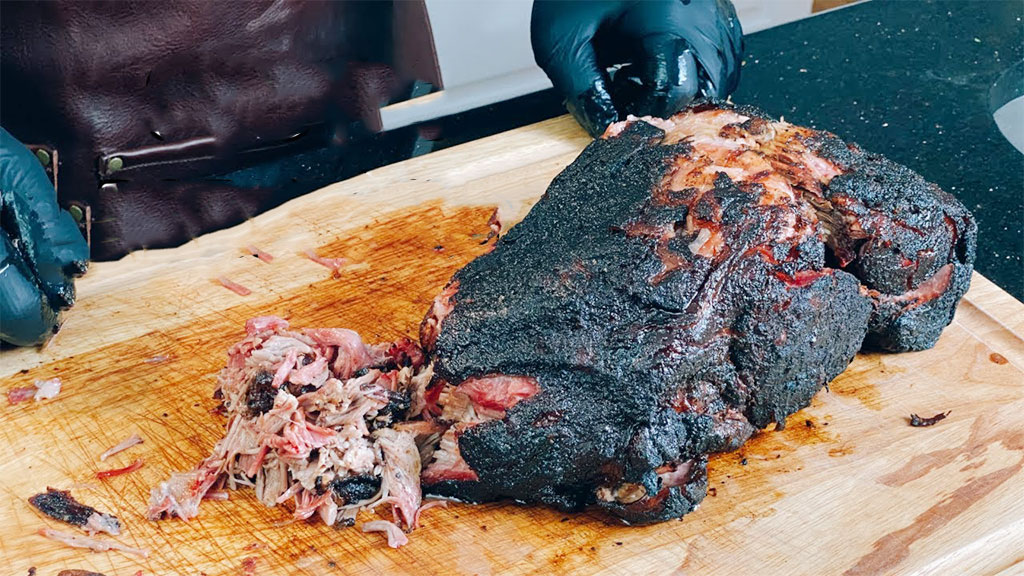
If you’re looking to elevate your Boston butt or ribs to mouthwatering perfection, mastering the art of a flavorful dry rub is key.
Crafting a balanced blend of spices that will infuse your meat with irresistible taste and aroma is a game-changer for any BBQ enthusiast.
Whether you’re a seasoned pitmaster or a novice griller, a great dry rub can take your dishes from good to exceptional.
In this article, discover the secrets to creating a tantalizing dry rub that will have your taste buds dancing with delight.
From the perfect blend of paprika and brown sugar to the subtle kick of cayenne pepper, this recipe will ensure that every bite is bursting with savory goodness.
Get ready to impress your guests and become the BBQ hero of your next cookout with this signature Boston dry rub recipe.
Essential Ingredients for Boston Butt Dry Rub
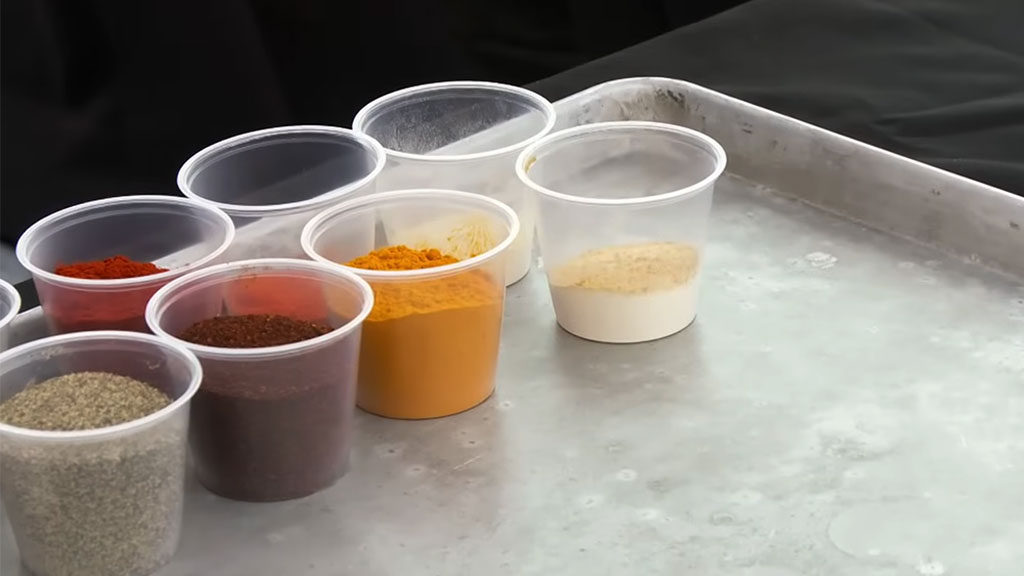
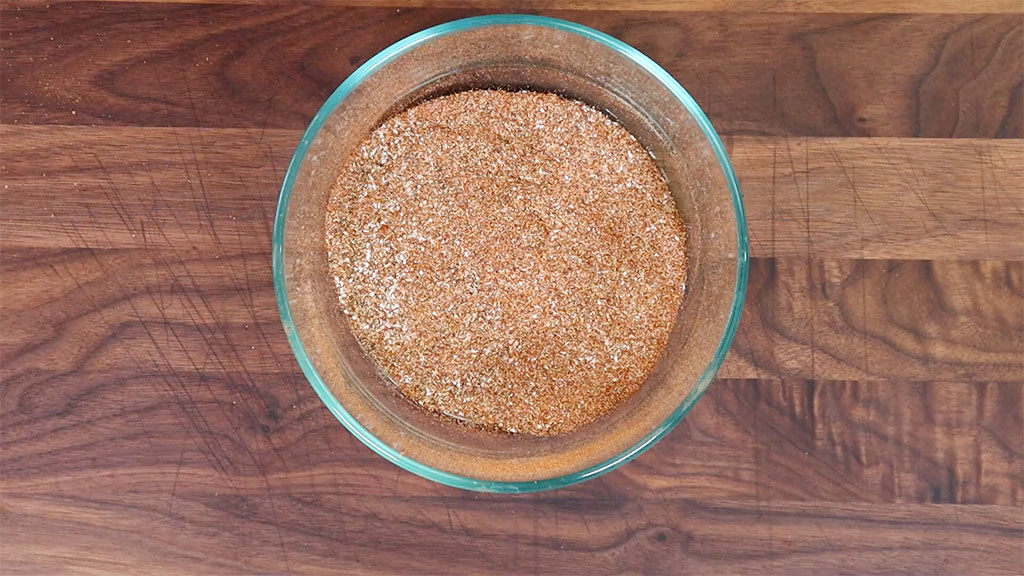
Crafting a flavorful dry rub plays a crucial role in enhancing the taste of Boston butt or ribs. For a well-balanced blend of spices to elevate the meat’s flavor, whether you’re an experienced pitmaster or a beginner griller, certain essential ingredients are key to creating a tantalizing dry rub.
Choosing the Right Spices
When selecting spices for your Boston butt dry rub, opt for a combination of paprika, cayenne pepper, garlic powder, onion powder, and black pepper.
These spices work harmoniously to create a robust flavor profile that will infuse your meat with mouthwatering taste. To enhance the flavor of your Boston butt even further, consider adding a touch of brown sugar to the mix.
The sweetness will complement the spiciness of the cayenne pepper and create a well-balanced flavor profile for your dry rub.
The Role of Salt and Sugar
In creating the perfect dry rub for Boston butt, salt and sugar are fundamental components. Salt enhances the overall flavor of the meat, while sugar helps to balance the savory and spicy elements of the rub.
Brown sugar, in particular, adds a hint of sweetness that caramelizes beautifully when cooked, resulting in a delectable crust on your meat.
Additionally, incorporating paprika into your dry rub mix will not only contribute a rich red color to the exterior of the Boston butt but also add a subtle peppery flavor.
Paprika is a versatile spice that complements the other ingredients in the rub, enhancing the overall taste profile of the meat.
Step-by-Step Guide to Making Boston Butt Dry Rub
Crafting a tantalizing dry rub can elevate the flavor of Boston butt or ribs to impress guests at your next cookout.
Follow this step-by-step guide for the perfect blend of spices.
Mixing Techniques
To ensure a well-balanced dry rub, start by mixing the spices thoroughly in a bowl. Use a whisk or fork to blend the ingredients evenly, ensuring that no clumps remain. For a finer texture, consider using a spice grinder to achieve a smoother consistency.
This is particularly useful when working with larger spices or seeds that may not blend as easily by hand. Grinding the spices will also help release more flavor, enhancing the overall taste of your dry rub for Boston butt or ribs.
Tips for Consistency
Creating a consistent dry rub for Boston-style dishes can elevate your cooking.
Here’s a versatile dry rub recipe along with some tips for achieving consistency:
Measure Accurately
Using proper measuring spoons and cups ensures that the proportions of ingredients are consistent every time you make the rub.
This precision is crucial for achieving the desired flavor balance. When measuring, level off the top of each spoon or cup with a straight edge to avoid over- or under-measuring.
Grind Fresh
Grinding whole spices just before mixing enhances both the flavor and aroma of your rub. Freshly ground spices release essential oils that can diminish over time in pre-ground spices.
Invest in a quality spice grinder or use a mortar and pestle to grind spices to a fine consistency, ensuring they blend well with other ingredients.
Mix Thoroughly
To achieve an even distribution of flavors, mix all ingredients thoroughly. Using a whisk can help break up clumps and combine ingredients uniformly.
For larger batches, consider using a food processor to blend the rub evenly. Sifting the mixture through a fine-mesh sieve can also ensure a smooth, lump-free rub.
Store Correctly
Proper storage is key to maintaining the rub’s freshness and potency. Transfer the rub to an airtight container to protect it from moisture and air, which can degrade the spices over time.
Store the container in a cool, dark place, such as a pantry or cupboard, away from direct sunlight and heat sources.
Label Clearly
Clearly label your container with the date of preparation to keep track of freshness. This practice helps you monitor the rub’s shelf life, ensuring you use it while it’s still potent. Include the name of the rub and any specific notes about the blend if you experiment with variations.
Batch Testing
Before using the rub on a large piece of meat, test it on a small piece to ensure the flavor profile meets your expectations.
This step allows you to make any necessary adjustments to the seasoning. Cook the test piece as you would normally prepare the dish to get an accurate sense of how the flavors develop.
Use Evenly
For consistent flavor throughout your dish, apply the rub evenly to the meat. Sprinkle the rub over the surface and massage it into the meat, covering all sides.
This technique helps the flavors penetrate and infuse the meat, providing a balanced taste in every bite.
Consistency in Spices
Using spices from the same brand or source can help maintain flavor consistency across batches. Different brands may have slight variations in spice potency and flavor.
By sticking to the same brand, you ensure that each batch of rub has a similar taste profile. If you switch brands, perform a test batch to adjust the proportions if necessary.
Measure Accurately
Using proper measuring spoons and cups ensures that the proportions of ingredients are consistent every time you make the rub.
This precision is crucial for achieving the desired flavor balance. When measuring, level off the top of each spoon or cup with a straight edge to avoid over- or under-measuring.
Grind Fresh
Grinding whole spices just before mixing enhances both the flavor and aroma of your rub. Freshly ground spices release essential oils that can diminish over time in pre-ground spices.
Invest in a quality spice grinder or use a mortar and pestle to grind spices to a fine consistency, ensuring they blend well with other ingredients.
Mix Thoroughly
To achieve an even distribution of flavors, mix all ingredients thoroughly. Using a whisk can help break up clumps and combine ingredients uniformly.
For larger batches, consider using a food processor to blend the rub evenly. Sifting the mixture through a fine-mesh sieve can also ensure a smooth, lump-free rub.
Store Correctly
Proper storage is key to maintaining the rub’s freshness and potency. Transfer the rub to an airtight container to protect it from moisture and air, which can degrade the spices over time. Store the container in a cool, dark place, such as a pantry or cupboard, away from direct sunlight and heat sources.
Label Clearly
Clearly label your container with the date of preparation to keep track of freshness. This practice helps you monitor the rub’s shelf life, ensuring you use it while it’s still potent.
Include the name of the rub and any specific notes about the blend if you experiment with variations.
Batch Testing
Before using the rub on a large piece of meat, test it on a small piece to ensure the flavor profile meets your expectations.
This step allows you to make any necessary adjustments to the seasoning. Cook the test piece as you would normally prepare the dish to get an accurate sense of how the flavors develop.
Use Evenly
For consistent flavor throughout your dish, apply the rub evenly to the meat. Sprinkle the rub over the surface and massage it into the meat, covering all sides.
This technique helps the flavors penetrate and infuse the meat, providing a balanced taste in every bite.
Consistency in Spices
Using spices from the same brand or source can help maintain flavor consistency across batches. Different brands may have slight variations in spice potency and flavor.
By sticking to the same brand, you ensure that each batch of rub has a similar taste profile. If you switch brands, perform a test batch to adjust the proportions if necessary.
How to Achieve Optimal Coverage
Properly applying a dry rub ensures that the flavors penetrate the meat, providing a delicious and consistent taste throughout.
Here’s a step-by-step guide to achieving optimal coverage:
Prepare the Meat
Before applying the dry rub, ensure the meat is properly prepared. Start by patting the meat dry with paper towels, as excess moisture can prevent the rub from adhering properly.
Additionally, trim any excess fat from the meat. While a little fat can add flavor, too much can hinder the rub from sticking to the meat.
Apply a Binding Agent
Using a light coating of a binding agent helps the rub adhere better to the meat. Common binders include mustard, olive oil, or Worcestershire sauce.
These don’t alter the flavor significantly but help the rub stick. Lightly coat the meat with the binder using your hands or a brush, ensuring an even layer without drenching the meat.
Measure the Rub
Estimate the amount of rub you need based on the weight of the meat. A good rule of thumb is to use about 1 tablespoon of rub per pound of meat.
This ensures ample coverage without overpowering the meat. To avoid contaminating the entire batch of rub, use a clean spoon or scoop to take out the needed amount.
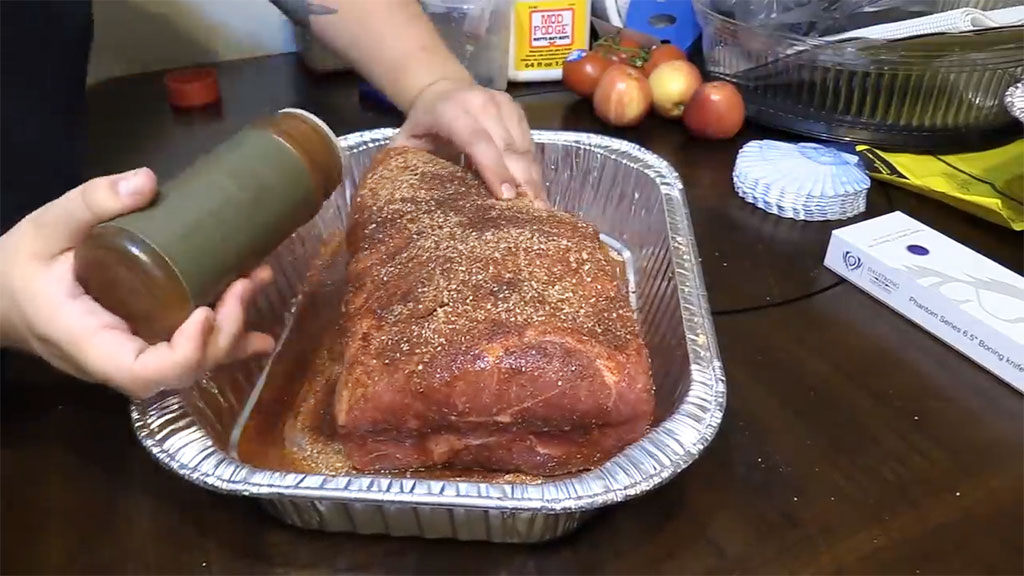
Apply the Rub Evenly
Sprinkle the rub evenly over the meat from a height of about 6-12 inches to ensure more even distribution. Make sure to cover all sides of the meat, including any nooks and crannies, as well as the ends and edges.
Massage the Rub In
Gently massage the rub into the meat using your hands, which helps the spices adhere better and start to penetrate the surface.
Ensure that every part of the meat is covered, paying special attention to thicker areas where the rub might not adhere as easily.
Let It Rest
Allow the meat to rest with the rub applied. Ideally, refrigerate it for at least one hour or up to overnight, as this resting period lets the flavors penetrate the meat. If refrigerating, cover the meat loosely with plastic wrap or place it in a covered container.
Pre-Cooking Prep
Before cooking, let the meat come to room temperature for even cooking. Give the meat a final once-over to ensure the rub hasn’t been rubbed off in places. Reapply the rub if necessary.
Variations to the Basic Boston Butt Dry Rub Recipe
Experimenting with different spices and ingredients can add unique flavors to your Boston Butt, allowing you to tailor the taste to your preferences or create something new for your guests.
Here are some variations to the basic Boston Butt dry rub recipe:
Adding Heat or Sweetness
For those who enjoy a bit of spice in their dishes, consider adding a teaspoon of chili powder or a pinch of cayenne pepper to the basic Boston Butt dry rub recipe.
This will elevate the heat level of the rub, giving your meat a fiery kick that is sure to leave your taste buds tingling.
On the other hand, if you prefer a sweeter flavor profile, incorporating a tablespoon of brown sugar or a drizzle of honey can add a delightful touch of sweetness to your dry rub, balancing out the savory spices with a hint of sugary goodness.
Regional Flavor Twists
To infuse your Boston Butt with regional flavors, consider incorporating ingredients that are emblematic of specific cuisines.
For a Southern twist, include a dash of smoked paprika or a hint of bourbon in your dry rub to give it that signature southern barbecue flavor.
If you’re looking to add a Tex-Mex flair, consider adding some ground cumin and a squeeze of lime juice to your rub for a zesty and tangy kick.
Experimenting with these regional flavor twists can take your Boston Butt to new culinary heights and impress your guests with unique and delicious variations.
Storing Homemade Dry Rubs
When considering Storing Homemade Dry Rubs, it’s essential to follow best practices for longevity to maintain the quality and flavor of your spice blend.
Best Practices for Longevity
For optimal longevity, store homemade dry rubs in airtight containers placed in a cool, dark, and dry location. It’s crucial to protect the spices from moisture and heat, as these can degrade the flavors over time.
Checking the storage area regularly for any signs of moisture or pests is a good practice to ensure the quality of your dry rub.
When storing your homemade dry rub for Boston butt, keep it in a cool, dark, and dry place. Moisture and heat can compromise the flavors over time, so it’s vital to shield the spices from these elements by using airtight containers.
Regularly inspect the storage area for any moisture or pest issues to maintain the quality of your dry rub.
Suitable Containers for Storage
Choose glass or plastic containers with tight-fitting lids to store your homemade dry rub effectively. Mason jars or sealable spice jars are excellent options as they help preserve the freshness and flavor of the spices.
Avoid storing dry rubs in metal containers, as they can react with the spices and alter their taste. Labeling the containers with the date of preparation can help you track the freshness of the dry rub and ensure you use it before the flavors diminish.
Frequently Asked Questions
How can I enhance the flavor of meats with a dry rub?
Create a well-balanced dry rub using spices like paprika, cayenne pepper, and garlic powder to enhance the flavor of meats like Boston butt or ribs.
What is the role of salt and sugar in a dry rub?
Salt and sugar in a dry rub create a savory-sweet balance. Be mindful of the right proportions to achieve the desired flavor profile.
What are some recommended mixing techniques for a dry rub?
For a dry rub, ensure thorough mixing of the spices to evenly distribute the flavors before applying it to the meat.
How should I store homemade dry rubs for longevity?
Store homemade dry rubs in airtight containers in a cool, dark, and dry location to prevent moisture and heat exposure, ensuring freshness and potency.
What are some regional flavor twists I can add to a basic dry rub?
Explore regional flavor variations by adding ingredients like smoked paprika for a Southern twist or cumin and lime juice for a Tex-Mex flair.
Why is it important to label containers with the preparation date for dry rubs?
Labeling containers with the preparation date helps track freshness and ensures optimal flavor retention for homemade dry rubs over time.
Conclusion
The dry rub recipe for Boston emphasizes the art of seasoning meats with a harmonious blend of spices. It covers the essential elements like paprika, cayenne pepper, and garlic powder, showcasing their role in elevating the flavor profile of dishes like Boston butt or ribs.
The balance between salt and sugar becomes crucial in achieving the desired savory-sweet equilibrium, enhancing the overall taste experience.
Exploring variations and regional twists, such as incorporating chili powder or brown sugar, allows for customization based on personal preferences.
Regional flavors like smoked paprika for a Southern touch or cumin and lime juice for a Tex-Mex influence bring diversity to the table, catering to different taste preferences.
Storing homemade dry rubs is equally crucial to maintaining their freshness and potency over time.
Following best practices, such as storing them in airtight containers in a cool, dark, and dry location, safeguards the integrity of the spices by protecting them from moisture and heat.
Opting for suitable containers like glass or plastic with tight-fitting lids is recommended, while steering clear of metal containers is advised.
Additionally, labeling containers with the preparation date ensures easy tracking of freshness, ensuring optimal flavor retention for your culinary creations.
Timothy Russell Dewart